I miss pizza.
Actually, I missED pizza because I feel like I’ve found the best recipe for me. After weeks of experimenting with different gluten-free crust options out there, I finally created the most satisfying one!
Let me start from the beginning.
First thing I did was look up gluten free pizza. This didn’t do me any good because most of the available options contained rice flour or nut flour (both which would be very bad if I consumed them). So, I crossed those off the list. (*There is this one premade GF pizza that I found out I could eat, but by the time I made this recipe, it was too late. I’m definitely keeping the brand in mind though. I don’t remember what it’s called because my memory is awful, but I can eat it!)
UPDATE: Husband found it. He said it’s called Smart Flour Foods. They use all these different grains, but I remember why I wasn’t really a fan. They use agave syrup in their crusts and I’m completely against eating it in any amount, no matter how little. *sigh*
Next best thing I saw posted were the cheese and cauliflower crust alternatives. Let me just clarify, I think cauliflower is disgusting. I don’t like the texture of it and it is just blah to me. It doesn’t tantalize my palate, so that part was out, BUT, there were still crust recipes that didn’t include it, so I tried those out.
This was a huge fail. The crusts didn’t come out crispy and I still felt myself lacking in satisfaction. Plus, the really good ones took forever to bake, and to dry out, AND to come to room temp just so I could put toppings on it and then bake it again. It was all just a hassle.
SO, I *finally* decided to make my own crust.
The first few batches didn’t turn out as well, and I realized that I needed to add more than just my usual, never-fail cassava flour.
I needed ingredients that gave the crust elasticity, substance, and texture, so I basically combined my pasta recipe with the cheese from the other gluten free recipes, and it worked!
I really feel like I made this journey more complicated than I should have, but hey, what can I do? It’s just something I had to figure out.
So as I type this, I’m happily eating my meatball pizza.
I know I’m going to be so satisfied after this. ❤
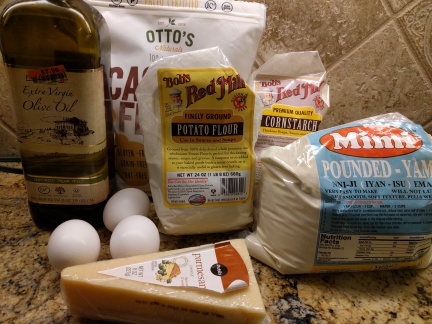
Ingredients:
- 1 1/2 cups of cassava flour
- 1 tablespoon of potato starch
- 1 tablespoon of corn starch
- 1 tablespoon of yam flour
- 1/2 cup of grated Parmesan cheese*
- 3 eggs
- 1/2 cup of water
- 1/2 cup of olive oil
*I’ve actually gotten into the habit of grating my own cheeses now just to avoid the extra starches most companies add their shredded cheese to prevent clumping. I don’t mind a few clumps. If anything, I just eat the clumps.
Directions:
- Combine all of your dry ingredients in a bowl, along with the Parmesan cheese.
- Combine all of your wet ingredients in another bowl, plus the eggs, and mix them until homogeneous.


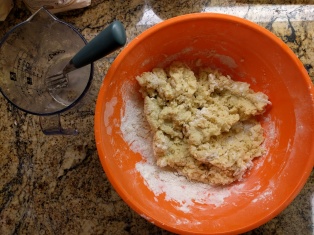
- Pour your wet ingredients into the bowl of dry ingredients and stir until your dough comes together.
- Flour a dry, clean surface (I use cassava) and knead the dough ball for about a minute.
- Form into a ball and wrap in saran wrap.
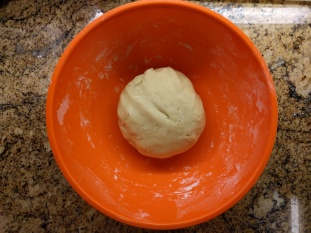
- Place dough into your refrigerator until chilled and ready for use.
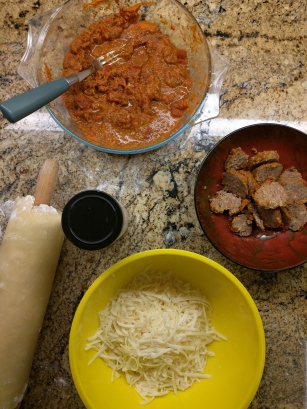
When it was cool, I preheated my oven to 450°F (232°C) and left my baking sheet in there while it reached temp. While that was happening, I prepared my toppings. I had more grated cheese (Parmesan & mozzarella), some leftover meatballs that I just sliced up, and the extra tomato sauce my meatballs were in. If I didn’t know any better, it’s like I knew I was going to be making this pizza.
Then I grabbed my crust and rolled it out to a size that would fit in the baking sheet and was about an 1/8-inch thick. This recipe makes 2 pretty large pizzas, so I suggest cutting it in half and saving one side for later.
Make sure when rolling out your dough, you flour your surface really well. You want the crust to come up from the surface without tearing. Luckily, this dough presses back together really well, but it’s still a hassle to do it. Also, you’re going to want to have super clean shapes and edges, just because uneven edges darken and burn quicker than straight ones. I learned this the hard way, but I didn’t mind it so much just because I love SUPER crispy crusts. I wound up eating all of the edges and leaving the centers for everyone else.
Yes, I’m that awful, but I can totally get away with it. I’m the one actually making the thing.
Anyways, once the oven reached 450°F, I pulled out the baking sheet and then placed the dough on the baking sheet (making sure to be careful about NOT burning myself), sprinkled a light layer of garlic powder (because I can), and returned to the oven to bake. I gave it between 10-15 minutes, or until the entire crust started to crack and the top of it started to brown. The edges will be a darker brown, but no worries.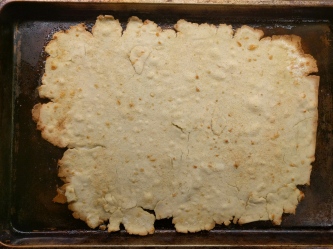
After that, I applied the toppings.
The first time I did this, I put on too much sauce and the crust turned soggy, so the next time, I just spread as thin of a layer as I could of diced tomatoes. It really made a difference.
So, tomato, meat, then cheese.
I think that’s the basic leveling pattern for pizza.
When my crust was fully topped, I returned the pizza back to the oven to finish baking for about another 15 minutes, until the top was bubbly.
And that’s it!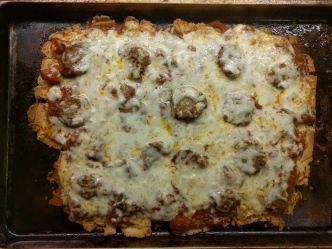
I definitely had to pat myself on the back for this one.
❤
